Categories
faq howto tutorial

Sending bookmarks to Twitter

The funny thing about sending bookmarks from Delicious to Twitter is that I did this entirely for myself. I never saw any demand for it until after I’d added it! Now I see lots of people wanting to do exactly that and it was a popular feature with beta testers. So here’s what it looks like:

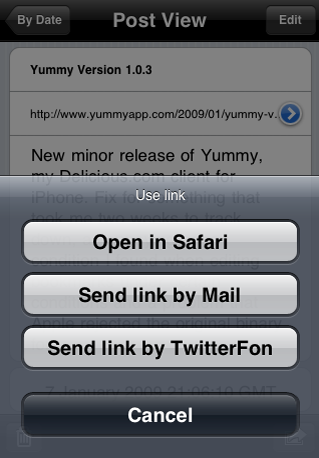
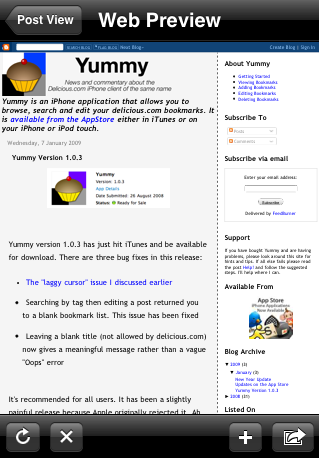
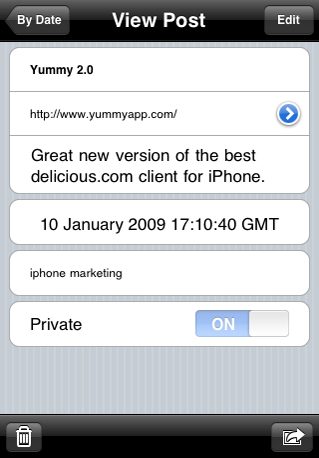
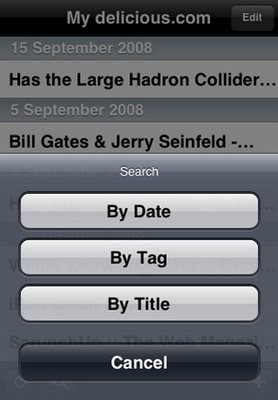
It’s simply a matter of selecting the option from the “action” menu found in both the bookmark view and and web preview screens.

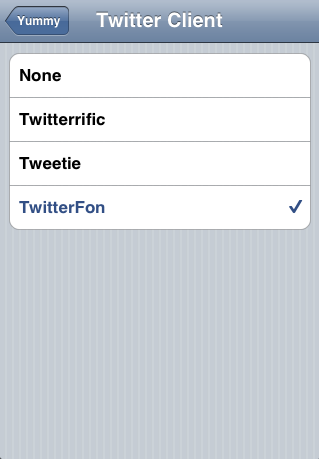
This is a screen-shot from my phone and hence shows my current favourite Twitter client, TwitterFon. If you prefer Twitterrific or Tweetie, though, you’re also in luck.

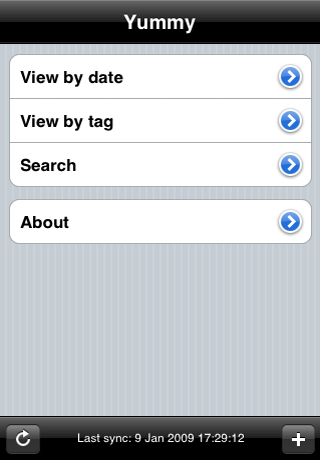
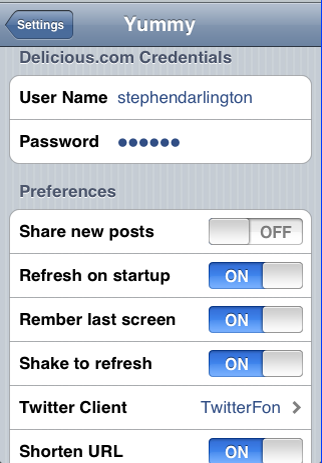
First go to the setting screen:

And then select the program you want to use for posting to Twitter:

Just below the “Twitter Client” setting is one called “Shorten URL.” This allows you to shorten the URL using is.gd before sending to Twitter.

Categories
faq howto support tutorial

Yummy Settings

The functionality of Yummy that we’ve seen over the last couple of weeks has pretty much been what you get “out of the box.” There is, however, an increasingly large number of switches and options in the Settings application that you can set to customise Yummy to work just the way you like.

You Delicious.com credentials are typically set when you launch Yummy for the first time. If you want to change to a different user or you’ve changed your password, this is where you change it.

Share new posts. Are new bookmarks public or private by default?

Refresh on startup. By default Yummy with try to synchronise your bookmarks as soon as you start. If you don’t change your bookmarks very often or have a lot of bookmarks and it takes a while to refresh, you may prefer to sync manually.

Remember last screen. If this option is set to ON Yummy will start in the same mode you were using last time you had it open. (Yes, in version 2.0 there’s a typo. This will be fixed in the next version.)

Shake to refresh. A fun option suggested by a user. Rather than having to press the Refresh button in the menu screen, you can simply shake your iPhone or iPod touch to initiate a full sync.

Twitter Client. Many Yummy users also regularly use Twitter. This option allows you to send bookmarks to your favourite Twitter client,

Shorten URL. If enabled, Yummy will shorten the URL using is.gd before sending to Twitter. This option is not used when sending links to Safari or Mail.

Categories
faq howto support tutorial

Web Preview

A popular request from users of version 1.0 if Yummy was a built-in web page viewer. I was more than happy to oblige.

The “action” menu at the bottom right is exactly the same as that found in the post view screen, with the same functionality and operation.

While mainly designed to view your bookmarks, it’s not unusual to venture off the well trodden path occasionally. If you find a page you want to bookmark as well, you can add it to Delicious using the “add” button which you’ll find to the left of the action button.

Categories
faq howto support tutorial

Bookmarks

All the information that delicious.com holds about your bookmarks are available in Yummy, whether you are on- or off-line.

Of course there’s no point in just looking at your bookmarks! You want to do something with them. The first option is hinted at by the arrow to the right of the URL. This opens the web preview. I’ll be talking about that a little more tomorrow.

There are further options that you can find by pressing the “Action” button in the bottom right of the screen:

The two options that are always available are open the link in Safari and send it to Mail. You can also configure Yummy to send the bookmark (optionally shortened using is.gd) to Twitter. More about that in a couple of days.

You can also edit any bookmark by pressing the “Edit” button in the top right of the screen. Unlike in Yummy version one, all editing, with the exception of the date field, is performed directly in this screen without flipping to an edit only screen.

An “add bookmark” screen looks very similar (see above) but the operation is exactly the same. You can add new bookmarks by pressing the “add” button that you’ll find in most Yummy screens. As with version one, the bookmarklet is also available when you’re in Safari. The instructions for adding it are exactly the same as before.

Categories
faq howto support tutorial

Searching for Bookmarks

Searching has always been a big feature of Yummy and has been revamped and improved for version two.

For starters, the screen looks different:

Note how that here we have searched for bookmarks that have both the “iphone” and “development” tag. A similar trick applies when you search by title and notes fields: it searches for all words but not necessarily in any given order. For example searching for “hello world” would find both “Hello there, world” and “World says Hello.”

Categories
faq howto support tutorial

View by Tag

Brand new in Yummy 2.0 is the ability to browse through your bookmarks by tag. You could already search for them but a number of users indicated that a screen like this would be very useful:

From here you can drill down to get a list of bookmarks.

One neat touch here (if I do say so myself) is that pressing “Add” button pre-populates the tags field with the current tag, so in this case the “Add bookmark” screen would have “iphone” in the tag field.

Categories
faq howto support tutorial

Menu Screen

There’s not a lot to say about the menu screen in the new version of Yummy.

From here you can select how you want to find your bookmarks. Using the toolbar at the bottom you can also force a refresh (useful mainly if you’ve disabled the automatic refresh on startup option) or add a new bookmark. We’ll cover all the various options in the next week or two.

Categories
howto tutorial

Feeling Refreshed?

From time to time users of Yummy ask me how often it synchronises its bookmarks with Delicious.com. I hope to answer that question in this post.

First a quick aside. How did I envisage people using Yummy when I was designing it? The idea was that it should pretty much stay out of the way. You’d open Yummy, search or browse for a bookmark and immediately flip over to Safari to see it. Or you’d start in Safari, add a bookmark that you want to read later and return to what you were doing.

In this usage pattern, if you have Yummy open for more than a couple of minutes at a time I’ve probably failed. Which means that doing a full refresh every, say, thirty minutes would be a waste of time.

Instead, Yummy checks to see whether there are any new updates to download every time you start it. Usually there are not and the refresh is almost instant. In fact, most users should never really need to use the refresh button at all — indeed I almost did not include it in the finish application.

But, with great power comes great responsibility. If you refresh very frequently occasionally Yummy will tell you “Delicious says that you’re refreshing too quickly.” The cause of this is, well, exactly as it says. Delicious will only allow a client to do a full refresh once every thirty minutes or so (the exact time seems to vary). This is not a limitation of Yummy; it’s a limit imposed by Delicious.

Categories
howto tutorial

Not Synchronised?

Occasionally Yummy will get out of sync with how Delicious sees the world. Usually pressing the “Refresh” button in the bottom left of the screen will bring things up to date. If there are a lot of changes you may want to check that you’re on a WiFi connection rather than a mobile network, but either should work.

Read on if this does not work.

The first thing you should do is not keep pressing refresh. Counter-intuitive perhaps, but sometimes the clock on your handset and those on the Delicious servers are in not sync meaning that Yummy does not think that there are any changes worth downloading. If you wait a while and try again it often works.

The next trick is to change a bookmark. Any bookmark, it doesn’t matter. Maybe add some new text to one, add a new tag, change the post from public to private (and back again). You can do this either using Yummy or on the Delicious.com website. When the change is complete, try pressing the Refresh button again.

I’ve never come across a synchronisation problem in a release version of Yummy that one of these two solutions has not fixed. If you’re not so lucky, the final step is to delete Yummy from your iPhone by pressing and holding the Yummy icon on the home screen. Once the icons all start wobbling, press the ‘X’ floating to the top-right of the Yummy icon and confirm you want to remove the application and all its data. Next time you sync with iTunes you’ll get a clean, new copy with an empty database.

If this doesn’t work, please let me know.

Categories
howto tutorial

Search by Title

One little feature that I probably should have made more of a fuss over when I added it in release 1.0.1 is the ability to search your posts by title. This was a popular request so I was very happy to include it. Of course Yummy has had the ability to search for one or more tags since its initial release.